


Building a NestJS Chat App with Websockets and MySQL
With Complete Source Code!


NestJS is one of the fastest-growing frameworks out there in terms of popularity. As we saw in an earlier post, it takes advantage of powerful HTTP server frameworks such as Express or Fastify. In this particular post, we will learn how to build a real-time chat application using NestJS.
On a high-level, we will be using the below tools to build our application:
NestJS
Websockets
TypeORM and MySQL
EJS Templates
Do note that to follow this tutorial, you need to have NodeJS installed on your system.
1 - Installation of NPM Packages
First step is to setup the project directory. We will be using NestJS CLI to scaffold our project. Therefore, we install the NestJS CLI.
$ npm install -g @nestjs/cli
Once the CLI is installed, we can use it to generate a new project.
$ nest new nestjs-chat-app-websocket
The CLI will prompt you for choosing the package manager. For this demo, we will use npm but you can go for yarn as well. Once the project is ready, we can start installing the requisite packages.
First, we install packages related to using websockets.
$ npm i --save @nestjs/websockets @nestjs/platform-socket.io
Next, we install packages for setting up the NestJS TypeORM connection with MySQL database.
$ npm i --save @nestjs/typeorm typeorm mysql2
Also, to use EJS templating engine with our NestJS application, we install the ejs package.
$ npm i --save ejs
With this, all the packages needed for the application are installed. We can even start the application at this point using the command npm run start. Alternatively, we can also start the app using npm run start:dev to run the application in watch mode. This is quite useful during development.
2 - Setting up NestJS TypeORM with MySQL
We can now setup our MySQL database to store chat messages. For quickly spawning a MySQL database, I usually use Docker to bring up a MySQL Docker container. However, you can also install MySQL on your host machine and make it accessible on port 3306.
To connect our NestJS application to the MySQL database, we need to make some configuration setup in the file app.module.ts.
import { Module } from '@nestjs/common';
import { AppController } from './app.controller';
import { AppService } from './app.service';
import { AppGateway } from './app.gateway';
import { TypeOrmModule } from '@nestjs/typeorm';
import { Chat } from './chat.entity';

@Module({
  imports: [
    TypeOrmModule.forRoot({
      type: 'mysql',
      host: 'localhost',
      port: 3306,
      username: 'root',
      password: 'password',
      database: 'chat',
      entities: [Chat],
      synchronize: true,
    }),
    TypeOrmModule.forFeature([Chat]),
  ],
  controllers: [AppController],
  providers: [AppService, AppGateway],
})
export class AppModule {}
As you can see, we setup the connection using TypeOrmModule.forRoot() method. This method takes a configuration object as input. The object contains the database details such as host name and credentials.
Note that it is NOT a good solution to hard-code username and password in this file for production cases. The username and password should come from a configuration file. More on that in another post. For the demo purpose, this works fine.
3 - Creating the Chat Entity
You might have noticed in the previous section that we imported Chat entity and used it within our TypeORM configuration.
Below is the actual Chat entity definition we will keep in a file named chat.entity.ts in the src directory.
import {
    Entity,
    Column,
    PrimaryGeneratedColumn,
    CreateDateColumn,
} from 'typeorm';

@Entity()
export class Chat {
    @PrimaryGeneratedColumn('uuid')
    id: number;

    @Column()
    email: string;

    @Column({ unique: true })
    text: string;

    @CreateDateColumn()
    createdAt: Date;
}
In the above class, we declared appropriate columns for storing chat information using @Entity, @Column, @PrimaryGeneratedColumn and @CreateDateColumn decorators. These decorators are available as part of the typeorm package.
4 - Setting up the Websockets Gateway
In NestJS, a gateway is simply a class annotated with @WebSocketGateway() decorator.
We can generate such a class using the Nest CLI command as below:
$ nest g gateway app
This will create a skeleton class with the file name app.gateway.ts within the src folder of our project.
Once the file is generated, we can update it as below:
import {
  SubscribeMessage,
  WebSocketGateway,
  OnGatewayInit,
  WebSocketServer,
  OnGatewayConnection,
  OnGatewayDisconnect,
} from '@nestjs/websockets';

import { Socket, Server } from 'socket.io';
import { AppService } from './app.service';
import { Chat } from './chat.entity';

@WebSocketGateway({
  cors: {
    origin: '*',
  },
})
export class AppGateway implements OnGatewayInit, OnGatewayConnection, OnGatewayDisconnect
{
  constructor(private appService: AppService) {}

  @WebSocketServer() server: Server;

  @SubscribeMessage('sendMessage')
  async handleSendMessage(client: Socket, payload: Chat): Promise<void>    {
    await this.appService.createMessage(payload);
    this.server.emit('recMessage', payload);
  }

  afterInit(server: Server) {
    console.log(server);
  }

  handleDisconnect(client: Socket) {
    console.log(`Disconnected: ${client.id}`);
  }

  handleConnection(client: Socket, ...args: any[]) {
    console.log(`Connected ${client.id}`);
  }
}
Let us understand what is happening in the above class.
The
WebSocketGatewaygives access to theSocket.iolibrary. We use the decorator on the class definition itself. Within the configuration object of the decorator, we enable CORS to allow the client communication with the server.Next, we have imports such as
OnGatewayInit,OnGatewayConnectionandOnGatewayDisconnect. Basically, these functions allow us to hook into various events and perform some operations. Right now, we simply log these events to the console.The constructor method binds our application’s
AppServiceso that we can access the service methods. Also, we create a server instance using theWebSocketServerdecorator.The
SubscribeMessageallows us to listen to messages from the client. We use it to decorate thehandleSendMessage()method. Basically, when a message is sent to this function from the client, we save it in our MySQL database and emit the message back to all the connected users on the client side.
5 - Creating the Static EJS Templates and Client
Next, we need to configure the application to render the static files for the chat UI. To do that, we need our application to support static files and set the view engine to ejs.
First, we will tweak the main.ts file as below:
import { NestFactory } from '@nestjs/core';
import { NestExpressApplication } from '@nestjs/platform-express';
import { AppModule } from './app.module';
import { join } from 'path';

async function bootstrap() {
  const app = await NestFactory.create<NestExpressApplication>(AppModule);
  app.useStaticAssets(join(__dirname, '..', 'static'));
  app.setBaseViewsDir(join(__dirname, '..', 'views'));
  app.setViewEngine('ejs');
  await app.listen(3002);
}
bootstrap();
As you can see, we import the NestExpressApplication from the platform-express package and then call useStaticAssets() method on the app object to support special folders named static and views. Also, we call setViewEngine() to ejs.
Within the views folder, we create a file named index.ejs with the below template code.
<!DOCTYPE html>
<html lang="en">

<head>
  <!-- Required meta tags -->
  <meta charset="utf-8" />
  <meta name="viewport" content="width=device-width, initial-scale=1" />

  <!-- Bootstrap CSS -->
  <link href="https://cdn.jsdelivr.net/npm/bootstrap@5.0.2/dist/css/bootstrap.min.css" rel="stylesheet"
    integrity="sha384-EVSTQN3/azprG1Anm3QDgpJLIm9Nao0Yz1ztcQTwFspd3yD65VohhpuuCOmLASjC" crossorigin="anonymous" />

  <title>Let Chat</title>
</head>

<body>
  <nav class="navbar navbar-light bg-light">
    <div class="container-fluid">
      <a class="navbar-brand">Lets Chat</a>
    </div>
  </nav>
  <div class="container">
    <div class="mb-3 mt-3">
      <ul style="list-style: none" id="data-container"></ul>
    </div>
    <div class="mb-3 mt-4">
      <input class="form-control" id="email" rows="3" placeholder="Your Email" />
    </div>
    <div class="mb-3 mt-4">
      <input class="form-control" id="exampleFormControlTextarea1" rows="3" placeholder="Say something..." />
    </div>
  </div>
  <script src="https://cdn.socket.io/4.3.2/socket.io.min.js"
    integrity="sha384-KAZ4DtjNhLChOB/hxXuKqhMLYvx3b5MlT55xPEiNmREKRzeEm+RVPlTnAn0ajQNs"
    crossorigin="anonymous"></script>
  <script src="app.js"></script>
  <script src="https://cdn.jsdelivr.net/npm/bootstrap@5.0.2/dist/js/bootstrap.bundle.min.js"
    integrity="sha384-MrcW6ZMFYlzcLA8Nl+NtUVF0sA7MsXsP1UyJoMp4YLEuNSfAP+JcXn/tWtIaxVXM"
    crossorigin="anonymous"></script>
</body>

</html>
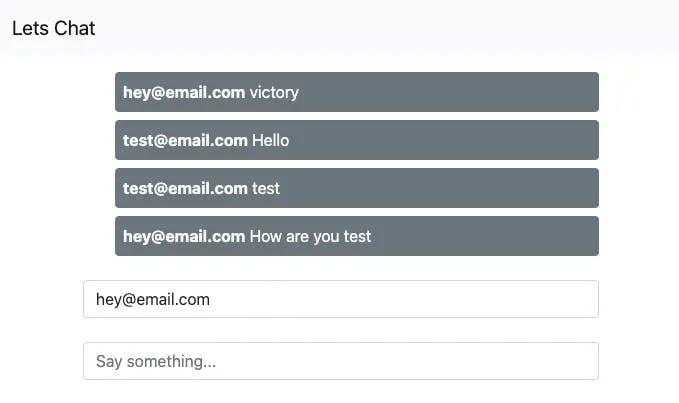
For some minimal styling, we have used Bootstrap in the above template. For sending chat messages, we have a couple of input fields and a list to display messages. With some basic chat messages, our chat app should look like below:
Inside the static folder, we create a file named app.js to keep our client code.
const socket = io('http://localhost:3002');
const msgBox = document.getElementById('exampleFormControlTextarea1');
const msgCont = document.getElementById('data-container');
const email = document.getElementById('email');

//Fetch old messages from the server
const messages = [];
function getMessages() {
 fetch('http://localhost:3002/api/chat')
   .then((response) => response.json())
   .then((data) => {
     loadDate(data);
     data.forEach((el) => {
       messages.push(el);
     });
   })
   .catch((err) => console.error(err));
}
getMessages();

//When a user press the enter key, send message.
msgBox.addEventListener('keydown', (e) => {
 if (e.keyCode === 13) {
   sendMessage({ email: email.value, text: e.target.value });
   e.target.value = '';
 }
});

//Display messages to the users
function loadDate(data) {
 let messages = '';
 data.map((message) => {
   messages += ` <li class="bg-secondary p-2 rounded mb-2 text-light">
      <span class="fw-bolder">${message.email}</span>
      ${message.text}
    </li>`;
 });
 msgCont.innerHTML = messages;
}

//socket.io
//emit sendMessage event to send message
function sendMessage(message) {
 socket.emit('sendMessage', message);
}
//Listen to recMessage event to get the messages sent by users
socket.on('recMessage', (message) => {
 messages.push(message);
 loadDate(messages);
})
In the above code snippet, we create a socket.io instance and configure it to listen to the events on our server in order to send and receive a message from the server.
6 - Creating the NestJS Controller and Service
Finally, we can create the service and controller classes for our application.
The app.service.ts file should contain the below code:
import { Injectable } from '@nestjs/common';
import { InjectRepository } from '@nestjs/typeorm';
import { Repository } from 'typeorm';
import { Chat } from './chat.entity';

@Injectable()
export class AppService {
  constructor(
    @InjectRepository(Chat) private chatRepository: Repository<Chat>,
  ) {}
  async createMessage(chat: Chat): Promise<Chat> {
    return await this.chatRepository.save(chat);
  }

  async getMessages(): Promise<Chat[]> {
    return await this.chatRepository.find();
  }
}
Basically, here we inject an instance of the ChatRepository class to read and write chat records to our MySQL database.
Next, we need to update the app.controller.ts file as below:
import { Controller, Render, Get, Res } from '@nestjs/common';
import { AppService } from './app.service';

@Controller()
export class AppController {
  constructor(private readonly appService: AppService) {}

  @Get('/chat')
  @Render('index')
  Home() {
    return { message: 'Hello world!' };
  }

  @Get('/api/chat')
  async Chat(@Res() res) {
    const messages = await this.appService.getMessages();
    res.json(messages);
  }
}
Basically, we have two routes in this file. One to render the EJS template and the second to fetch the chat messages from the repository.
7 - Testing the NestJS Chat Application
Testing the application is pretty straightforward. All we have to do is to start the application and open it in two different browser tabs and use different email ids to send messages to each other.
As you send messages back and forth, you can also see the information displayed in the console.
With this, we have successfully built a NestJS Chat Application using Websockets and MySQL.
The code is available on Github in case you wish to play around with it further.
How did you find this post? Have you been using NestJS in your project? If yes, how do you find NestJS as a framework?
I would love to hear your thoughts on this matter. So, please do post your views in the comments section. And if this post was helpful, please do like and share it.